Throwing a UINavigationController, UITabBarController and UISearchBar Together
In my last blog post I did a tutorial on building a SearchView using UISearchBar and UITableView. This time around I’m going to talk about mixing together a UINavigationController, UITabBarController and UISearchBar together to see what we get. For this post I’m starting out with a brand new project and doing everything from there, but it should be trivial to do this in the same project as last time (that’s actually what I did the first time around). As always, if all you care about is the code [be my guest](http://jduff.github.com#/2010/03/09/throwing-a-uinavigationcontroller-uitabbarcontroller-and-uisearchbar-together.htmlfull-code, but be warned, we’re doing a lot more in Interface Builder this time.
Background
Okay, so what exactly are we going to build this time? We’re going to start with a Tab Bar application which is going to have a UINavigationController as one of its View Controllers. Once we get this all set up we’re going to add a UISearchBar as the navigationItem of the initial view.
When we’re all done we’ll have something like this:
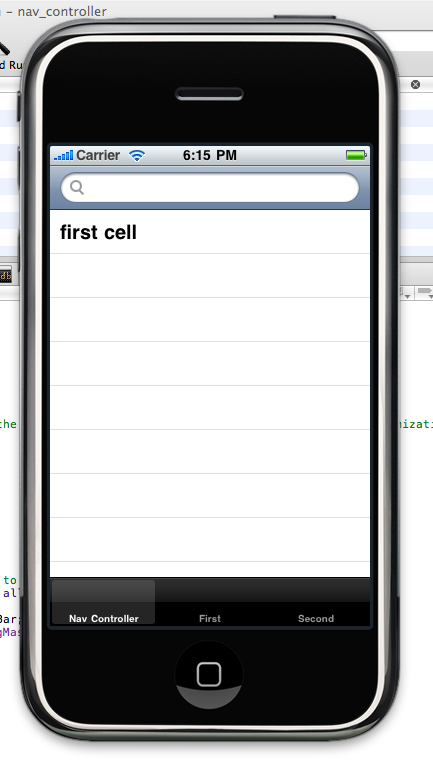
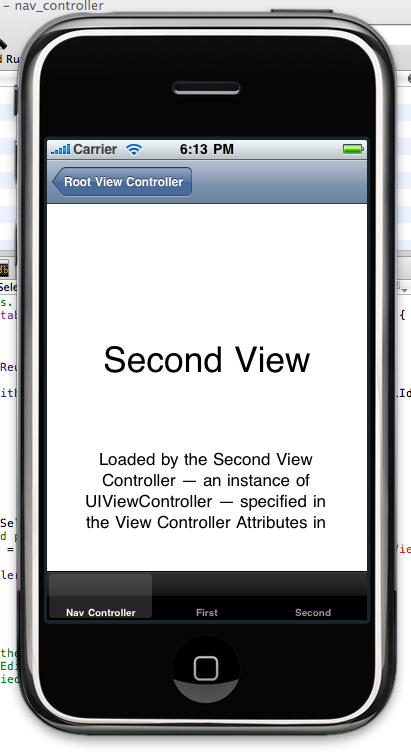
So we have the UISearchBar in the navigationItem and when we push another View Controller onto the stack it slides over nicely to give you the back button.
Setting up the Project
As I said earlier I am starting with a Tab Bar application but you should be able to use any starting point for the application you would like. I wont go into the details of creating the initial project but once you’re ready to go and have a UITabBarController in there (the Tab Bar application gives one to you) open up the Main Window Nib and take a look at it.
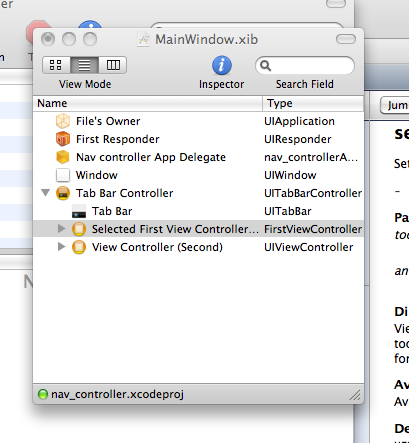
This is pretty straight forward, we have the UITabBarController and it has a couple of View Controllers that it switches between. If you run the app right now this is what you would see:
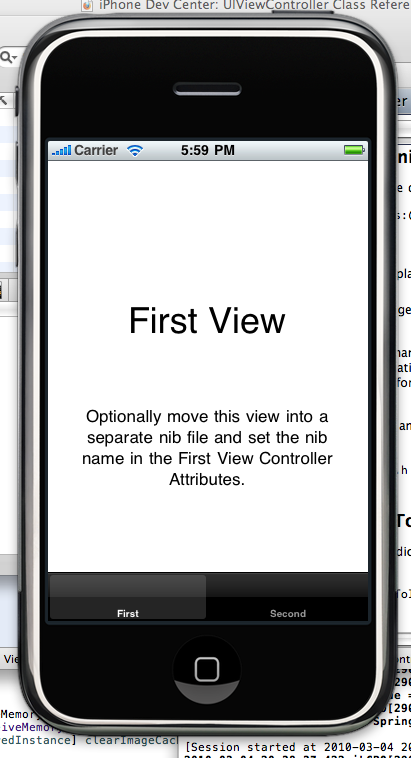
Simple. Lets add the UINavigationController
Adding the Navigation Controller to the Mix
Okay, lets switch back to Interface Builder and drop the UINavigationController into the Nib inside of the UITabBarController. Here’s what we’re looking at after that:
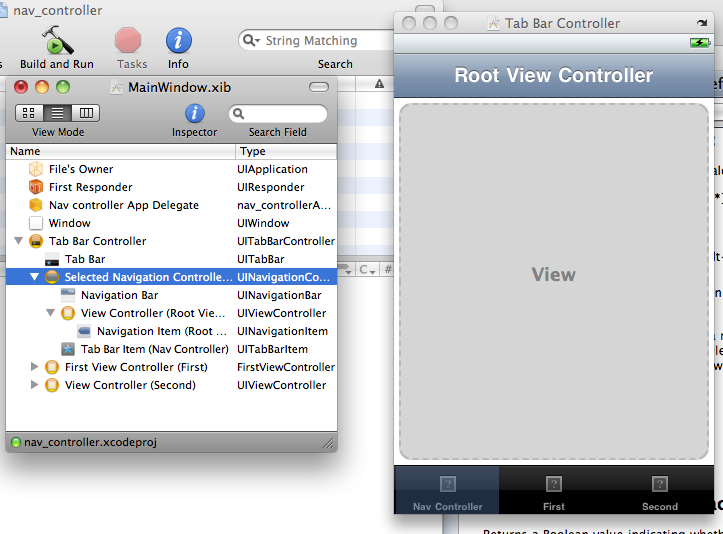
Notice how it’s inside the UITabBarController and another button was added to the Tab Bar? Next we want to add another View for the UINavigationController to display. I just created a new UITableViewController (Xcode File -> New File) from Xcode and added it to the project.
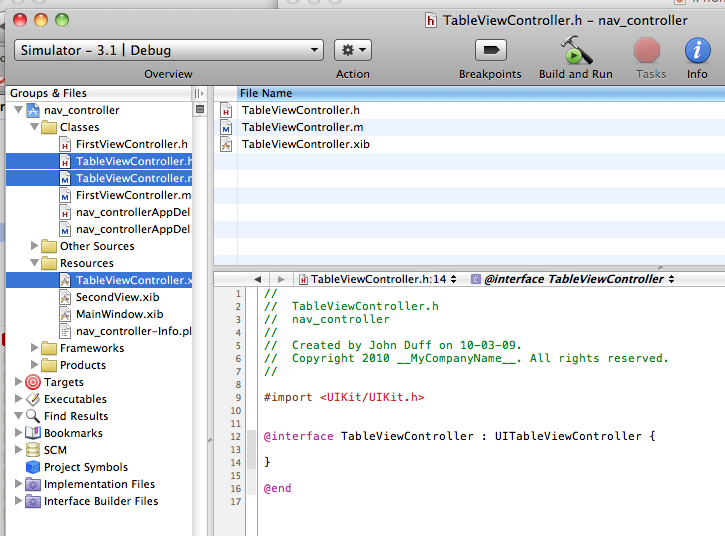
With that added we switch back to Interface Builder and change the class for the UIViewController that is inside the UINavigationController.
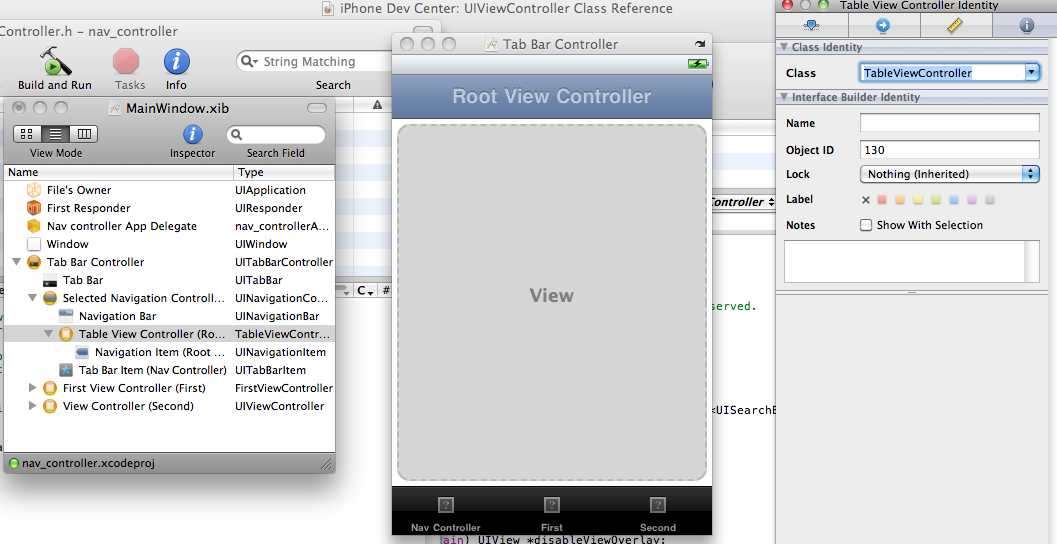
All we had to do is select the current View Controller in the Nib and then in the Identity Inspector select our new Class in the Class drop down.
Now when we run the project we see our Table View show up along with the Navigation Bar.
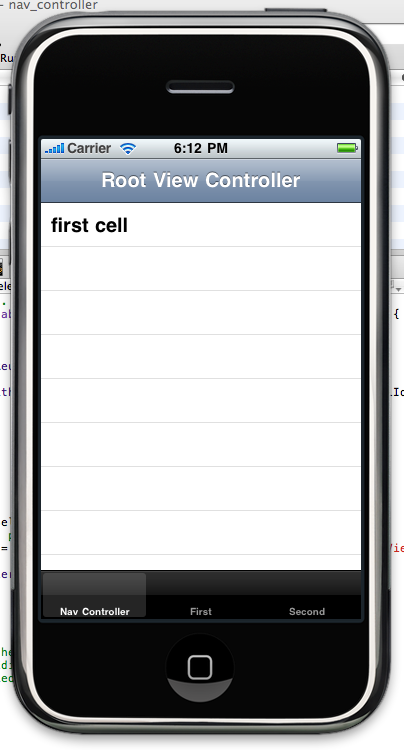
Okay, we’re just about done. Next we’re going to add that Search Bar to the Navigation Bar.
Pushing the Search Bar into the Navigation Bar
Alright, time to actually get in and add some code! Lets get into Xcode and open up that Table View Controller we created and add a few lines to the viewDidLoad method.
//  TableViewController.m

#import "TableViewController.h"

@implementation TableViewController

- (void)viewDidLoad {
    [super viewDidLoad];

	// Creating the UISearchBar and adding it to the
	// UINavigationController
	UISearchBar *theSearchBar = [[UISearchBar alloc]
	    initWithFrame:CGRectMake(0.0f,0.0f,320.0f,0.0f)];
	[theSearchBar sizeToFit];
	self.navigationItem.titleView = theSearchBar;
	self.navigationItem.titleView.autoresizingMask =
	    UIViewAutoresizingFlexibleWidth;
	[theSearchBar release];
}

@end
The main thing to take note of here is that we’re adding the Search Bar to the navigationItem.titleView and then setting the autoresizingMask on it to be flexible. This might seem like a bit of a hack, and it very well might be, but it does the job. I also called sizeToFit on my SearchBar so that it would expand to fit the whole bar. Let’s take a look.

There we have it! Now when you select an item from the Table View and push another View Controller onto the stack the Search Bar slides out of the way for the back Bar Item. If you take a look at the full code below you’ll see how to do this.
Something to note, if you want to change the color of the Navigation Bar you will also want to set the tint on the Search Bar so it fits in.
theSearchBar.tintColor = [UIColor colorWithRed:0.0f green:0.0f
    blue:0.0f alpha:0.5f];
This will set the tint to be black, very much like the ‘Black Opaque’ style that can be set on may UI elements.
Conclusion
There we go, we have a Tab Bar with a Navigation Bar for one of the items and we’ve pushed a Search Bar into the Navigation Bar. I’ve included the code below along with some of the generated methods for the Table View Controller that I hooked up. If you have any suggestions or feedback please [leave a comment](http://jduff.github.com#comments!
<a id=‘/2010/03/09/throwing-a-uinavigationcontroller-uitabbarcontroller-and-uisearchbar-together.htmlfull-code’ ></a>
//
//  TableViewController.m

#import "TableViewController.h"
#import "FirstViewController.h"


@implementation TableViewController

- (void)viewDidLoad {
    [super viewDidLoad];

	// Creating the UISearchBar and adding it to the UINavigationController
	UISearchBar *theSearchBar = [[UISearchBar alloc] initWithFrame:CGRectMake(0.0f,0.0f,320.0f,0.0f)];
	[theSearchBar sizeToFit];
	self.navigationItem.titleView = theSearchBar;
	self.navigationItem.titleView.autoresizingMask = UIViewAutoresizingFlexibleWidth;
	[theSearchBar release];
}

- (void)didReceiveMemoryWarning {
	// Releases the view if it doesn't have a superview.
    [super didReceiveMemoryWarning];

	// Release any cached data, images, etc that aren't in use.
}

- (void)viewDidUnload {
	// Release any retained subviews of the main view.
	// e.g. self.myOutlet = nil;
}


#pragma mark Table view methods

- (NSInteger)numberOfSectionsInTableView:(UITableView *)tableView {
    return 1;
}


// Customize the number of rows in the table view.
- (NSInteger)tableView:(UITableView *)tableView numberOfRowsInSection:(NSInteger)section {
    return 1;
}

// Customize the appearance of table view cells.
- (UITableViewCell *)tableView:(UITableView *)tableView cellForRowAtIndexPath:(NSIndexPath *)indexPath {

    static NSString *CellIdentifier = @"Cell";

    UITableViewCell *cell = [tableView dequeueReusableCellWithIdentifier:CellIdentifier];
    if (cell == nil) {
        cell = [[[UITableViewCell alloc] initWithStyle:UITableViewCellStyleDefault reuseIdentifier:CellIdentifier] autorelease];
    }

    cell.textLabel.text = @"first cell";

    return cell;
}

- (void)tableView:(UITableView *)tableView didSelectRowAtIndexPath:(NSIndexPath *)indexPath {
    // Navigation logic may go here. Create and push another view controller.
	FirstViewController *anotherViewController = [[FirstViewController alloc] initWithNibName:@"SecondView" bundle:nil];
	[self.navigationController pushViewController:anotherViewController animated:YES];
	[anotherViewController release];
}

- (void)dealloc {
    [super dealloc];
}


@end
Comments
comments powered by Disqus